8 Expert Ways How to Sharpen a Brush Cutter
The scent of crushed chlorophyll and damp, friable loam signals the start of the clearing season. When a brush cutter blade loses its edge, it no longer severs plant tissue cleanly; instead, it crushes the vascular bundles of woody stalks, leading to ragged tears that invite fungal pathogens into the remaining rootstock. Maintaining a surgical edge is the only way to ensure the plant's turgor pressure remains stabilized after the cut. Learning how to sharpen a brush cutter is a fundamental skill for any land manager who prioritizes the physiological health of their acreage. A dull blade forces the engine to run at higher RPMs, increasing heat and potentially scorching the surrounding rhizosphere through exhaust radiation. Precision sharpening ensures that every pass through dense brambles or saplings is a clean, decisive strike that preserves the structural integrity of the machine and the biological health of the landscape.
Materials:
Before engaging with the steel, assess the environment where the tool operates. In soils with a high **Cation Exchange Capacity (CEC)**, such as heavy clays, the mineral density can dull a blade faster than in sandy substrates. If your soil pH is below **6.0**, the increased acidity can accelerate surface oxidation on the blade. You will need a **10-inch mill bastard file**, a bench vise with rubber jaw protectors, and a digital angle gauge. For those working in rocky terrain where the blade frequently strikes granite or limestone, a handheld diamond whetstone is necessary to remove significant burrs. Always wear **5-mil nitrile gloves** under leather work gloves to prevent oil contamination of the steel and protect against lacerations.
Timing:
The ideal window for heavy brush clearing and blade maintenance aligns with the dormant season in Hardiness Zones 5 through 8. Sharpening should occur before the "Biological Clock" of the local flora triggers the spring flush. As plants transition from winter dormancy to the vegetative stage, their sap flow increases. Cutting during this high-turgor phase requires a blade that can slice through hydrated cellulose without shredding. Aim to sharpen your equipment when the soil temperature is consistently below 45 degrees Fahrenheit. This prevents the spread of dormant spores that might otherwise be agitated by the mechanical vibration of a dull, struggling blade.
Phases:

Sowing the Edge
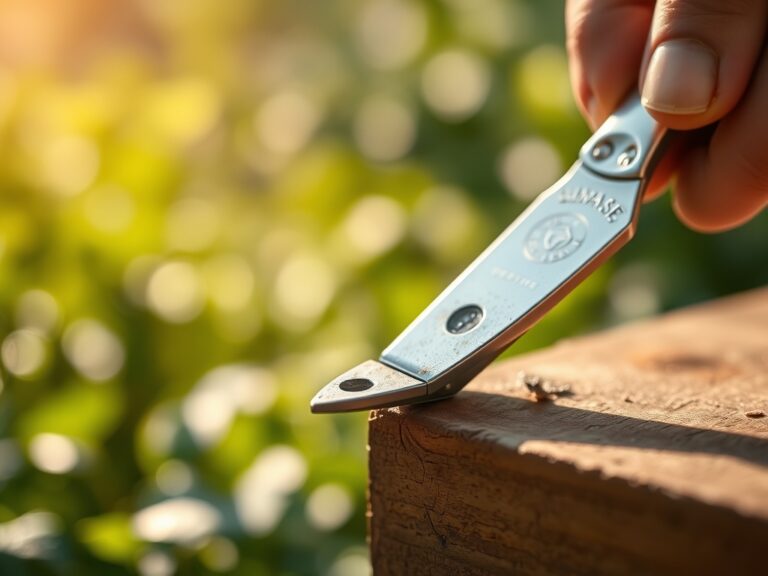
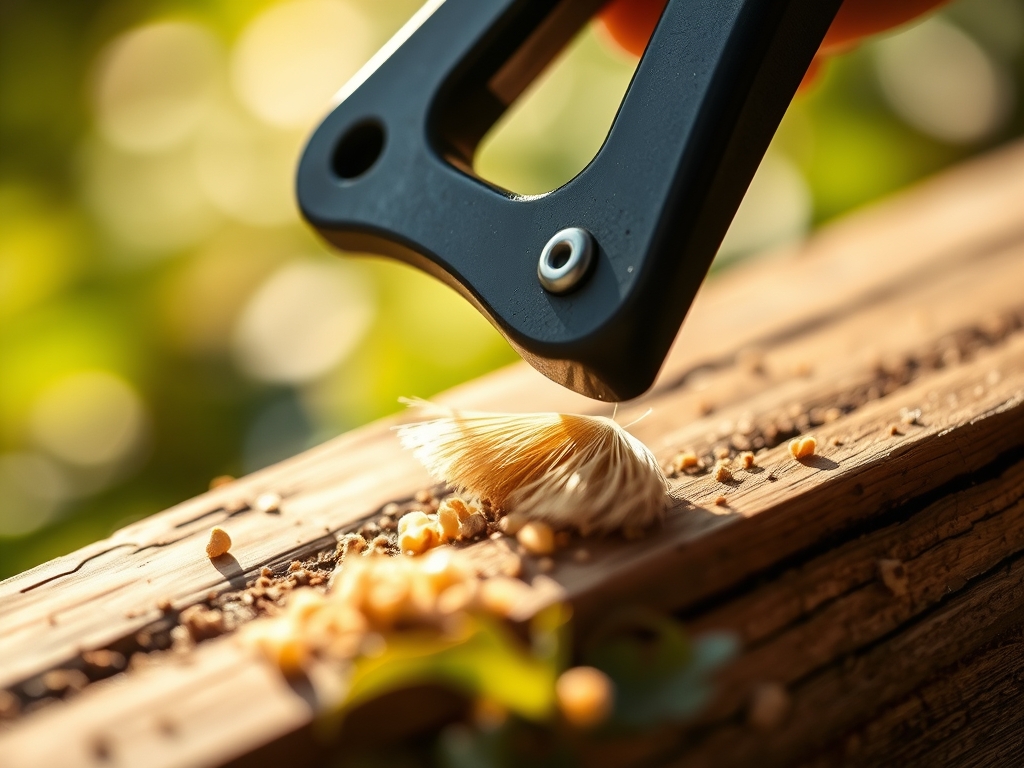
Begin by securing the brush cutter blade in a vise. You must maintain the factory bevel, which is typically set at a 30-degree angle. Use long, rhythmic strokes with the mill file, moving only in one direction: away from your body. Do not saw back and forth, as this creates heat friction that can ruin the steel's temper.
Pro-Tip: Maintaining a consistent angle prevents "blade chatter." If the angle is too shallow, the blade will skip over woody stems; if too steep, the edge will chip upon impact with high-cellulose stalks. This precision protects the plant's xylem and phloem, allowing for faster compartmentalization of the wound.
Transplanting the Focus
If the blade has sustained heavy damage from striking stones, you must "transplant" the edge by grinding down the nicks until the metal is uniform. Use a 80-grit flap disc on an angle grinder for significant metal removal, but keep a spray bottle of water nearby. Frequently douse the steel to ensure the temperature does not exceed 400 degrees Fahrenheit, which would cause the metal to lose its hardness.
Pro-Tip: Excessive heat during sharpening alters the molecular structure of the steel. This is a form of "mechanical senescence" where the metal becomes brittle. Keeping the blade cool ensures it can withstand the high torque required to slice through dense fibrous plants without shattering.
Establishing Balance
A sharpened blade must be balanced. Place the center hole of the blade on a vertical nail or a dedicated cone balancer. If one side dips, file more material off the heavy end. An unbalanced blade creates centrifugal vibrations that can destroy the gearbox and cause "mechanical stress" to the operator's joints.
Pro-Tip: Vibration at the cutting head can disrupt the mycorrhizal symbiosis in the soil if the blade scalps the earth. A balanced blade ensures the kinetic energy is focused entirely on the plant tissue rather than being dissipated into the soil profile.
The Clinic:
When a brush cutter is not performing, the vegetation will show clear physiological symptoms.
- Symptom: Ragged, "White-Topped" Stems. This indicates the blade is tearing the fibers rather than cutting them. Solution: Re-establish the 30-degree bevel using a mill file.
- Symptom: Excessive Machine Vibration. This suggests the blade is out of balance or bent. Solution: Use a balancer and check the blade for flatness against a machinist's square.
- Symptom: Rapid Blunting. This often occurs when cutting in high-silica soils or sandy loam. Solution: Increase the honing frequency and consider a carbide-tipped blade for high-abrasion environments.
For nutrient-related issues in the landscape, observe the foliage. Nitrogen chlorosis (yellowing of older leaves) can be fixed by applying a fertilizer with an NPK ratio of 20-10-10. If you notice interveinal chlorosis on new growth, check for iron deficiency, often caused by a soil pH above 7.5.
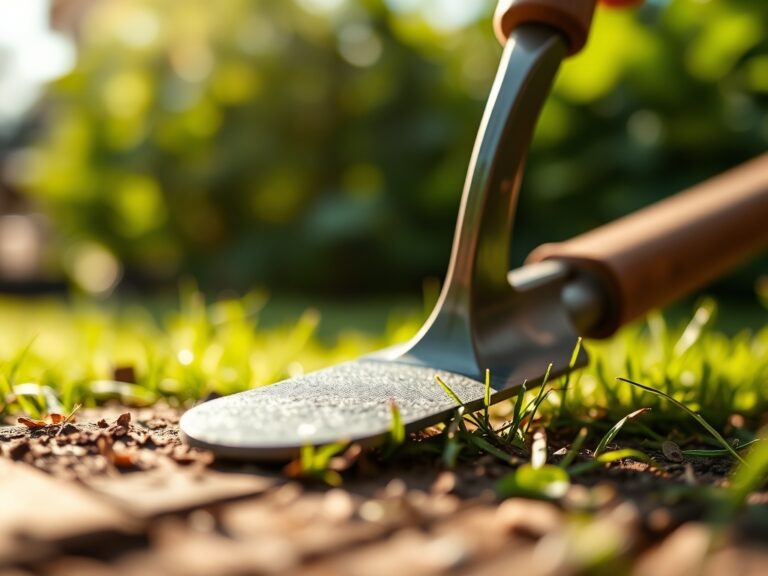
Maintenance:
Post-sharpening maintenance is as critical as the sharpening process itself. After every four hours of operation, wipe the blade down with a light machine oil to prevent oxidation. In the field, use a hori-hori knife to scrape away packed mud and vegetative debris from the guard to maintain airflow. Ensure the vegetation you are clearing receives at least 1.5 inches of water per week at the drip line if you are performing selective thinning; this keeps the remaining plants' turgor pressure high, helping them recover from the pruning stress. Use a soil moisture meter to verify that the clearing process hasn't led to excessive evaporation from the newly exposed soil surface.
The Yield:
When clearing for harvest, such as harvesting elderberry canes or willow switches, the sharpness of the blade determines the "day-one" freshness of the material. A clean cut seals the vascular system quickly, preventing the loss of internal moisture. For woody perennials, harvest when the plant has reached peak carbohydrate storage in the root system, usually in late autumn. Handle the harvested material by immediately placing the cut ends in a 5 percent sucrose solution to maintain osmotic potential during transport.
FAQ:
How often should I sharpen my brush cutter blade?
Sharpen the blade every 5 to 10 hours of use. If you encounter rocky soil or dense, woody stalks, inspect the edge hourly. A sharp blade reduces fuel consumption and prevents mechanical strain on the engine.
Can I use a bench grinder to sharpen the blade?
Yes, but exercise extreme caution. High-speed grinding generates intense heat that can soften the steel. Dip the blade in water every 10 seconds to maintain the temper and prevent the metal from becoming brittle and dangerous.
What is the best angle for a brush cutter blade?
The industry standard is a 30-degree bevel. This angle provides the optimal balance between a razor-sharp edge for soft grasses and the structural durability needed to slice through saplings and thick brush without chipping the steel.
How do I know if my blade is balanced?
Hang the blade horizontally on a screwdriver or a cone balancer. If the blade remains level, it is balanced. If one side tilts downward, file small amounts of metal from that side's trailing edge until it sits perfectly level.